Why Is Water Coming Through My Concrete Floor? A Diagnostic Guide for Auckland Homeowners
To get rid of a musty smell in your garage, you first need to treat it as a moisture problem, not just an odour problem: clear out stored items, check the slab and lower walls for damp patches, staining or white, powdery efflorescence, and look for any signs of leaks or water tracking in after rain. Once you have a sense of where the moisture is coming from, improve ventilation and run a dehumidifier to dry the space out, then deal with the source by fixing obvious leaks, unblocking gutters and drains, and sealing any damp concrete or masonry with an appropriate waterproofing or sealing system so the smell doesn’t come back. If the musty odour keeps returning or you suspect a bigger waterproofing issue under the slab or behind the walls, it is worth bringing in a garage and basement waterproofing specialist in Auckland to investigate properly before you line or renovate the space, so you are not trapping hidden moisture behind new finishes.
- The Three Main Sources of Concrete Floor Water
- How to Test Your Concrete Floor: 3 Simple Methods
- Is It Groundwater or a Plumbing Leak? How to Tell
- Why Auckland Homes Are Particularly Prone to Concrete Floor Moisture
- Emergency Measures: What to Do Right Now
- When to Call a Professional
- Frequently Asked Questions
- What's Next: Matching Solutions to Your Diagnosis
- Need Professional Help?
Discovering water on your concrete floor can trigger immediate panic. Is it a burst pipe? Rising groundwater? Something worse? Before you call a professional or attempt expensive repairs, the smartest first step is identifying exactly where the water is coming from—because the source determines the solution.
This guide helps Auckland homeowners diagnose concrete floor moisture problems using simple DIY tests, understand what the signs mean, and know when professional help is essential.
The Three Main Sources of Concrete Floor Water
Water appearing on your concrete floor typically comes from one of three sources. Each requires a completely different approach to fix, which is why correct diagnosis saves you time, money, and frustration.
1. Groundwater Infiltration
This is the most common cause in Auckland homes. Water from the surrounding soil pushes through or under your concrete slab due to hydrostatic pressure—essentially, the weight of waterlogged soil forcing moisture through any available path.
Why it’s common in Auckland: Our region’s clay-rich soils (especially prevalent in North Shore, West Auckland, and parts of South Auckland) retain water rather than draining it away. Combined with 1,200mm+ annual rainfall and seasonal water table fluctuations, Auckland homes face persistent groundwater pressure.
2. Plumbing Leaks
A broken or corroded pipe beneath or within the slab can leak water that eventually surfaces. This is often harder to detect because the leak may be small and slow.
Common in Auckland because: Many homes built in the 1960s-1980s have galvanised steel or copper pipes that corrode over time. Concrete movement from Auckland’s clay soils can also stress pipe joints.
3. Condensation
When humid air meets a cold concrete surface, moisture condenses—similar to water droplets forming on a cold glass. This isn’t water coming through the floor; it’s water forming on the floor.
Common in Auckland because: Our humid subtropical climate, combined with poor ventilation in garages and basements, creates ideal condensation conditions, particularly in winter.
How to Test Your Concrete Floor: 3 Simple Methods
Before calling anyone, try these diagnostic tests. They’ll help you understand what you’re dealing with and give useful information to any professional you eventually contact.
Test 1: The Plastic Sheet Test (Moisture Source Test)
This simple test determines whether moisture is coming UP through the concrete (groundwater/rising damp) or forming ON TOP (condensation).
What you need:
- Clear plastic sheet (approximately 50cm × 50cm)
- Strong tape (duct tape or packing tape)
- 24-48 hours of patience
Steps:
- Choose an area where you’ve noticed moisture
- Ensure the concrete surface is dry and clean (wipe it down if needed)
- Tape the plastic sheet firmly to the floor, sealing ALL edges completely
- Wait 24-48 hours without disturbing it
- Check the results
Reading the results:
| What You See | What It Means |
| Moisture droplets UNDER the plastic (on the concrete side) | Water is coming UP through the concrete—likely groundwater infiltration or rising damp |
| Moisture droplets ON TOP of the plastic | Condensation from humid air—not a waterproofing issue |
| Concrete appears darker under the plastic | Moisture is migrating up through the slab |
| No moisture visible | Moisture may be intermittent (try testing after rain) or the issue may be elsewhere |
Important note: This test indicates the presence of moisture but doesn’t quantify how severe the problem is. It’s a useful first step, not a complete assessment.
Test 2: The Water Meter Test (Plumbing Leak Detection)
If you suspect a plumbing leak rather than groundwater, this test can help confirm it.
Steps:
- Turn off ALL water-using appliances (dishwasher, washing machine, ice maker)
- Ensure no taps are running and no toilets are filling
- Locate your water meter (usually at the front boundary of your property)
- Note the meter reading or mark the dial position
- Wait 2 hours without using any water
- Check the meter again
Reading the results:
| What You See | What It Means |
| Meter has moved | You likely have a leak somewhere in your system |
| Meter hasn’t moved | Plumbing leak is less likely (but not impossible if leak is very slow) |
If the meter has moved, the next step is determining whether the leak is inside (your responsibility) or between the meter and your house (potentially the council’s responsibility for the portion on council land).

Test 3: Visual Inspection Checklist
A systematic visual inspection can reveal important clues about your moisture source.
Crack patterns to look for:
| Crack Type | What It Indicates |
|---|---|
| Hairline surface cracks (random pattern) | Normal shrinkage—usually not a water entry point |
| Cracks following straight lines | May indicate control joint failure or slab movement |
| Cracks wider at top than bottom | Settlement or structural movement—get professional assessment |
| Cracks with white residue around edges | Active water movement (efflorescence) |
Stain patterns to examine:
| Stain Type | What It Indicates |
|---|---|
| White powdery residue (efflorescence) | Mineral salts deposited by water evaporation—confirms water is moving through concrete |
| Dark patches that stay consistently wet | Active moisture source—likely groundwater |
| Ring-shaped marks or tide lines | Intermittent water (comes and goes with rain or season) |
| Rust-coloured staining | Possibly corroding reinforcing steel or pipe leak |
Location mapping:
Note WHERE the water appears first and most severely:
- Along walls/perimeter: Suggests water entering at wall-floor junction (common groundwater entry point)
- Centre of floor: More likely rising through slab or plumbing leak
- Near bathroom/kitchen: Consider plumbing leak as primary suspect
- Low points in floor: Water naturally collects in depressions—may not indicate entry point
Is It Groundwater or a Plumbing Leak? How to Tell
Sometimes the source isn’t immediately obvious. Here’s how to differentiate:
Signs Pointing to Groundwater Infiltration
- Timing correlation: Water appears 24-72 hours after heavy rainfall
- Seasonal pattern: Worse in winter/early spring when water table is highest
- Location: Moisture concentrated along walls, edges, or perimeter
- Extent: Affects broader areas rather than isolated spots
- Smell: Musty, earthy odour (not sewage)
- Neighbourhood pattern: Your neighbours report similar issues
- Building era: Pre-1990s homes without modern damp-proof membranes
Signs Pointing to a Plumbing Leak
- No rain correlation: Water appears regardless of weather
- Localised area: Wet spot in one specific location
- Water bills: Unexplained increase in water usage
- Sounds: Faint sound of running water when nothing is on
- Meter test: Water meter moves when all taps are off
- Smell: If sewage smell is present, suspect drain pipe (urgent)
Signs Pointing to Condensation
- Weather correlation: Worse on humid days, not rainy days
- Temperature difference: Floor feels noticeably cold to touch
- Ventilation link: Problem areas have poor airflow
- Disappears with heating: Moisture reduces when space is warmed
- No efflorescence: White salt deposits are absent
- Surface only: Moisture wipes away and doesn’t return immediately
Why Auckland Homes Are Particularly Prone to Concrete Floor Moisture
Understanding Auckland’s unique challenges helps you assess your situation more accurately.
Soil Types
Auckland sits on diverse geology, but clay soils dominate many suburbs. Clay has two problematic characteristics:
- Poor drainage: Water doesn’t percolate through clay—it sits and builds pressure
- Expansion/contraction: Clay swells when wet and shrinks when dry, causing ground movement that can crack concrete and break waterproofing seals
Higher-risk areas: North Shore (Birkenhead, Beach Haven, Glenfield), West Auckland (Henderson, Te Atatu), parts of South Auckland, and hillside suburbs built on clay.
Seasonal Water Table Changes
Auckland’s groundwater levels fluctuate significantly between seasons:
- Winter/Spring (June-October): Water table at its highest following winter rains
- Summer/Autumn (November-May): Water table drops as rainfall decreases and evaporation increases
If your moisture problem appears only in winter/spring, seasonal water table rise is a likely factor.
Building Era Considerations

The age of your home significantly affects moisture risk:
| Era | Typical Situation |
|---|---|
| Pre-1960s | Unlikely to have any damp-proof membrane (DPM). Ground moisture can rise directly through concrete. |
| 1960s-1970s | May have polythene DPM, but installation quality varied. DPM may have degraded or been punctured. |
| 1980s-1990s | Should have DPM, but materials and methods were still evolving. Check for edge seal failures. |
| Post-2000 | Should have compliant DPM per current Building Code, but installation quality still matters. |
To check if your home has a DPM: Look at the floor edge where it meets walls—sometimes the membrane is visible as a dark plastic layer. For older homes, council building records (if available from Auckland Council) may show specifications. Otherwise, a professional can assess by drilling a small test core or using moisture testing equipment.
Emergency Measures: What to Do Right Now
If water is actively coming through your floor, take these immediate steps:
Step 1: Document Everything
- Take photos and videos with timestamps
- Note the date, weather conditions, and recent rainfall
- Measure the affected area
- This documentation is essential for insurance claims and professional assessments
Step 2: Protect Your Belongings
- Move furniture, boxes, and valuables away from affected areas
- Lift items onto pallets or plastic sheeting if you can’t move them
- Remove carpets or rugs that may trap moisture
Step 3: Improve Ventilation
- Open windows and doors to increase airflow
- Use fans to circulate air across the wet area
- Run a dehumidifier if available
- This won’t solve the problem but reduces secondary damage (mould, odours)
Step 4: Do NOT Seal Over Active Water
- Resist the urge to paint waterproof coating over the wet area
- Sealing traps moisture, which can cause worse problems (delamination, mould growth behind the coating, pressure buildup)
- Address the source before applying any coatings
Step 5: Check for Electrical Hazards
- If water is near electrical outlets, switches, or appliances, exercise extreme caution
- Consider turning off power to affected areas at the switchboard
- Don’t touch electrical fittings while standing in water
Step 6: Track the Pattern
- Note when water appears and disappears
- Record if it correlates with rain, time of day, or water usage
- This information is valuable for professional diagnosis
When to Call a Professional
While DIY diagnosis is useful, some situations require expert assessment:
Call Immediately If:
- Standing water that doesn’t drain or dry
- Sewage smell—indicates drain pipe breach (health hazard)
- Structural cracking—cracks wider than 5mm or showing displacement
- Electrical concerns—water near wiring or switchboards
- Rapid worsening—significantly more water than previous occurrences
Schedule Professional Assessment If:
- DIY tests are inconclusive—can’t determine the source
- Multiple sources suspected—may be combination of groundwater and plumbing
- Planning renovation—need moisture testing before installing flooring
- Insurance claim required—professional report strengthens your claim
- Recurring problem—previous repairs haven’t resolved the issue
What to Expect from Professional Assessment
- Drainage assessment: Check external drainage, gutters, and ground levels
- Written report: Documents findings and recommends solutions
If your diagnosis reveals groundwater issues and you’re planning a renovation, our basement renovations guide covers the full waterproofing process.

Frequently Asked Questions
Check the floor edge where it meets walls—sometimes the membrane is visible as a dark plastic layer. For older homes, council building records (if available from Auckland Council) may show specifications. Otherwise, a professional can assess by drilling a small test core or using moisture testing equipment.
Not advisable without addressing the moisture first. Carpet will grow mould, timber will warp, and vinyl may bubble or lift. Even waterproof vinyl planks can trap moisture beneath, causing issues over time. Solve the moisture problem first, or use floor systems specifically designed for high-moisture substrates.
Typically 24-72 hours, depending on soil type and drainage. Heavy clay soils may delay water movement longer. If water appears immediately during rain, check for surface drainage issues (water pooling against walls) rather than groundwater infiltration.
No. A dehumidifier removes moisture from the air—it doesn’t stop water entering through concrete. It may reduce symptoms (dampness, mould) but won’t address the source. Consider it a temporary measure while you arrange proper repairs.
Photograph and video the damage with timestamps. Note dates, weather conditions, and timeline of events. Keep records of any emergency repairs and their costs. Contact your insurer early—some policies require notification within specific timeframes. A professional inspection report strengthens your claim.
The powder itself isn’t harmful—it’s mineral salts (primarily calcium carbonate) deposited when water evaporates. However, it’s a symptom of water movement through your concrete, which can cause long-term damage if unaddressed. Clean it off with water and a stiff brush, but focus on stopping the water source.
What’s Next: Matching Solutions to Your Diagnosis
Once you’ve identified your moisture source, the solution becomes clearer:
If groundwater is the cause:
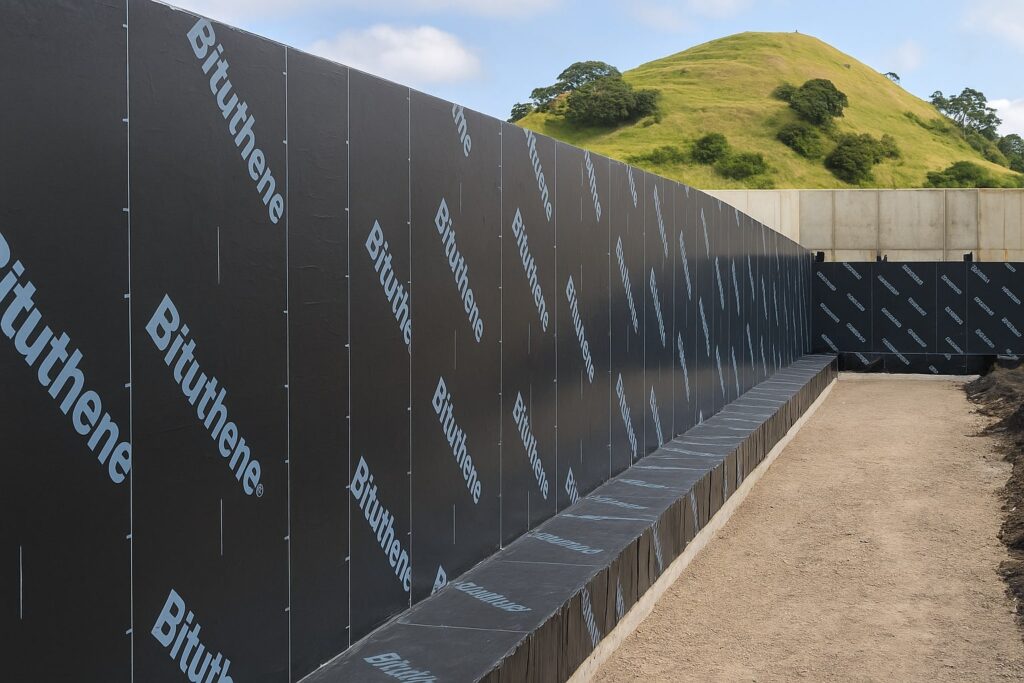
You’ll need a waterproofing solution designed to manage hydrostatic pressure—such as cavity drain membranes, cementitious waterproofing, or external tanking. The right choice depends on your specific situation, building type, and budget.
If a plumbing leak is the cause:
Contact a licensed plumber for leak detection and repair. Once the leak is fixed, allow the concrete to dry thoroughly before assessing whether any waterproofing repairs are needed.
If condensation is the cause:
Focus on improving ventilation (passive or mechanical), adding insulation to raise floor temperature, and managing indoor humidity levels. Waterproofing products won’t help with condensation.
Need Professional Help?
If your diagnosis points to groundwater infiltration or you’re unsure about the source, professional assessment is the logical next step. Our team specialises in below-ground waterproofing solutions for Auckland homes, with experience across all soil types and building eras.
Related resources:
- Basement and Garage Waterproofing Solutions
- Below Ground Waterproofing and Tanking Systems
- The Complete Guide to Waterproofing in Auckland