Leaking basement wall in Parnell: what we found behind the linings and how we sealed it from the inside
A leaking basement wall case study by Auckland Waterproofing Experts
A leaking basement wall doesn’t always look like one. In this Parnell basement, the linings looked fine, but the block walls behind them were wet. Here’s how we found it, why it was happening, and how Auckland Waterproofing Experts sealed the walls from the inside. If you’ve ever wondered what’s going on behind your basement linings, this one’s for you.
What a leaking basement wall can look like
The room had two walls fully below ground, both covered in chipboard linings. From inside the room, nothing looked badly wrong. The owners couldn’t tell whether the walls were damp behind the linings, and that’s exactly why they asked us to have a look.
That’s common with lined basements. The linings hide the block, so water can be getting through for a long time before you see a stain, a smell or a lifting skirting. If you’re not sure what to look for yet, our guide to the early signs of a basement leak is a good place to start.
What we found at the leaking basement wall on the free site visit
Moisture readings behind the linings
We started with a moisture meter on the chipboard linings. The readings came back elevated, in the yellow and red rather than the green, and they were highest at the bottom of the walls, near the skirtings.
A small opening first
Before pulling anything big off the wall, we made a small opening. Behind it, we found moisture. With that confirmed, the owners agreed to have all the linings on both walls removed so we could see the full picture.
What the bare block showed
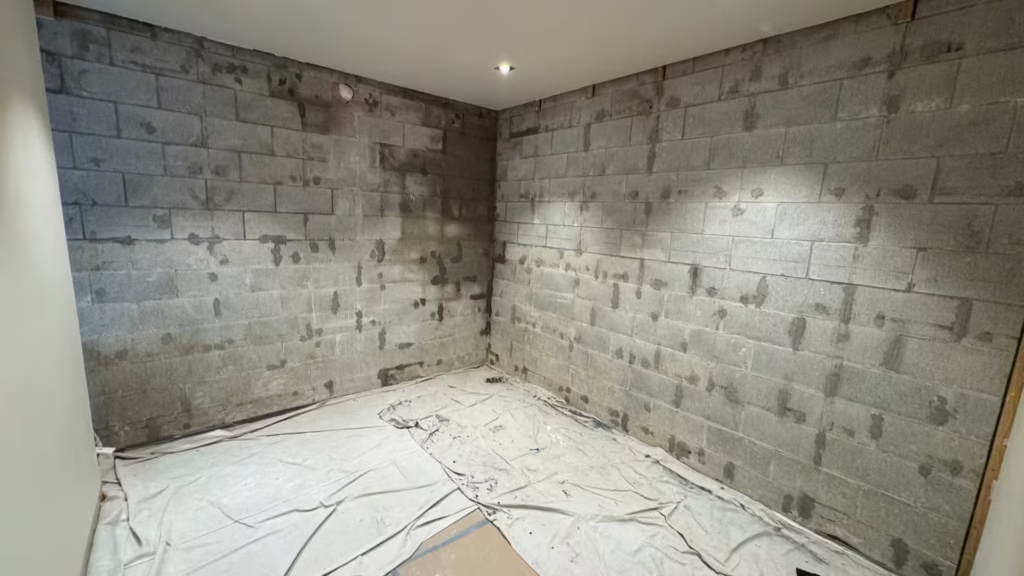
Once the linings were off, the block told the story. There were large patches of damp block, each one over 1 m², across both below-ground walls.
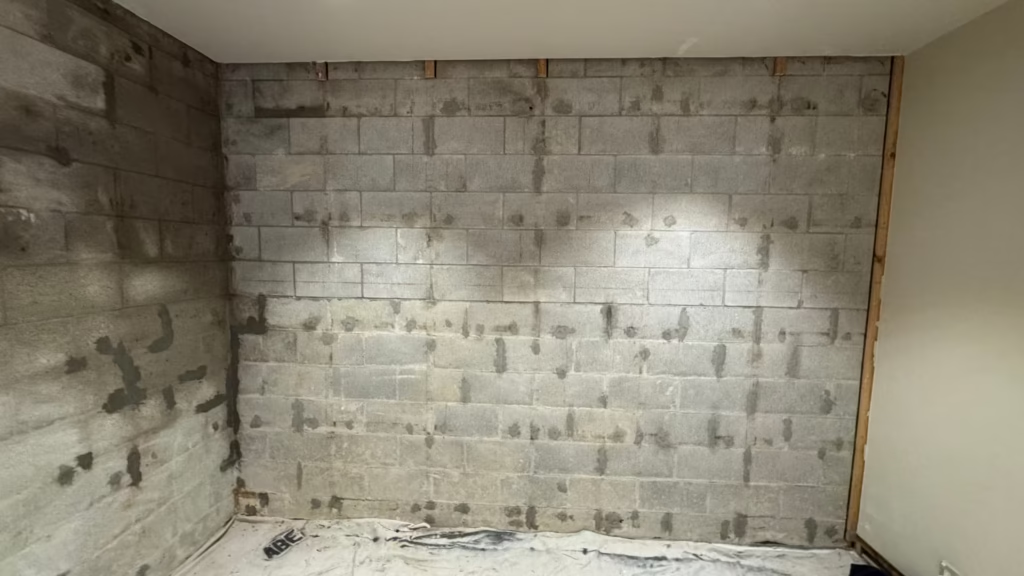
Why this leaking basement wall was wet
The building is around 20 years old. Below-ground walls like these rely on a membrane on the outside face to keep the ground water out. A small hand dig outside partially exposed the existing membrane, a Voclay clay membrane about 20 years old, and it showed the membrane was failing. Water in the surrounding ground was working its way into the block and through to the inside.
Tree roots growing against the walls and the membrane looked to be the main outside cause.
Concrete block is strong, but it’s porous. Once the outside membrane stops doing its job, water pressure from the soil pushes moisture through the block, and the linings hide it until someone takes a proper look.
Why we sealed the leaking basement wall from the inside
The usual way to fix a failed outside membrane is to dig down beside the wall and apply new outside tanking. Full re-tanking here would need a digger, and on this site a digger can barely get in, so that wasn’t practical.
The only outside work is a gardener poisoning the roots so they come away from the walls and the membrane. Everything else was done from inside the room.
Working on the inside face is called negative-side waterproofing, because the membrane goes on the opposite side to where the water is pushing from. It needs a product made for that job. That’s why ARDEX WPM 300 HydrEpoxy was the right fix here.
What we did: ARDEX WPM 300 HydrEpoxy on the inside face
ARDEX WPM 300 HydrEpoxy is a two-component, water-based epoxy moisture barrier. It bonds to damp concrete and block, and it’s rated for negative-side use against hydrostatic pressure. That suits a wall where the water is coming from the outside and we can only reach the inside.
Preparing the walls
A local building company did the prep. They removed the chipboard linings, GIB, battens and nails, then filled the holes and gaps in the block walls. HydrEpoxy needs a clean, sound surface to bond to, so that groundwork matters.
Two coats on both walls
Auckland Waterproofing Experts then applied two coats of HydrEpoxy to both below-ground walls, covering the full area that had been behind the linings.
Fibreglass reinforcement at joints and weak areas
The joints and the weaker areas of the wall got fibreglass reinforcement. These are the spots that move most or let water through first, so they need the extra strength.
Joining the walls to the floor
The floor already had HydrEpoxy on it from an earlier job of ours, and it’s still performing well. We connected the new wall membrane to the floor membrane, so walls and floor now work as one continuous barrier, with no gap at the junction for water to find.
Two days on site
Once the walls had been opened up, the HydrEpoxy application took two days.
The result
The waterproofing is complete, and the walls are dry now. Both below-ground walls are sealed on the inside face in light grey HydrEpoxy and joined to the floor.
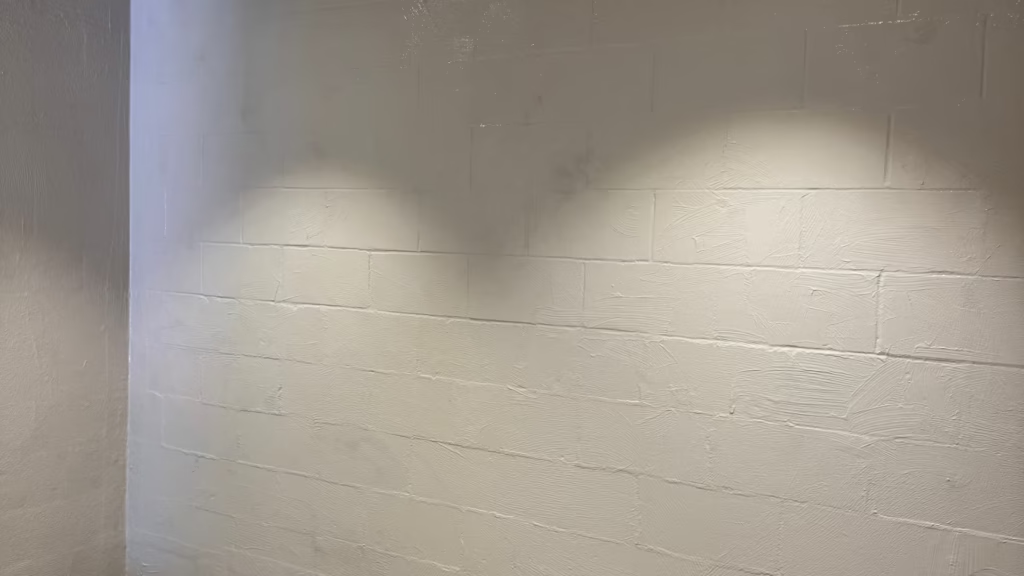
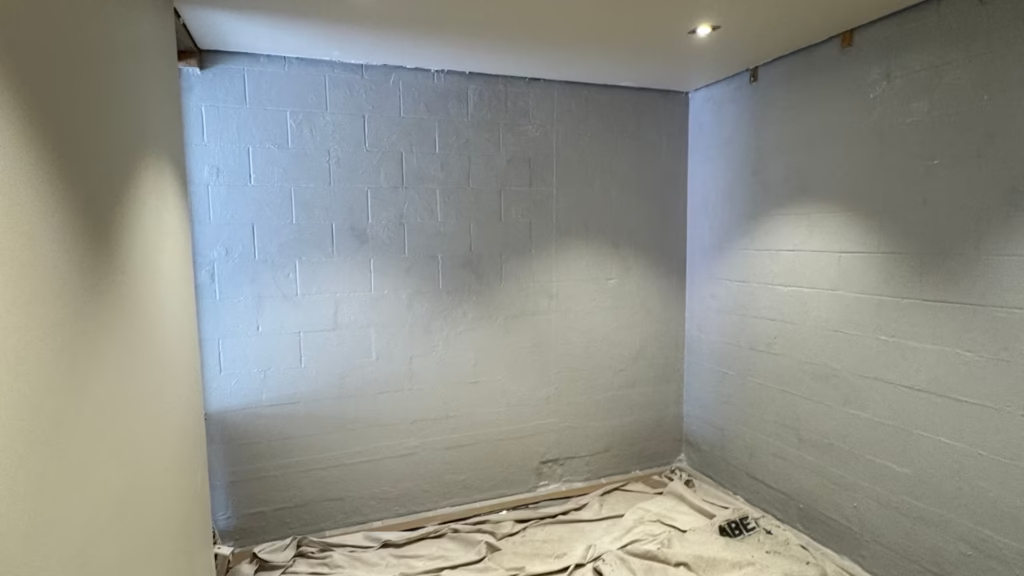
The owners are happy with the result.
In the owners’ words: “Your level of workmanship and finish with attention to detail is commendable. We look forward to using the space again soon.” ARDEX backs WPM 300 with a 10-year product warranty, and Auckland Waterproofing Experts gives a 5-year workmanship warranty.
Wondering what’s behind your own basement linings? Send us a couple of photos.
What this means for your basement
A few signs are worth getting checked, even if the linings look fine:
- Damp or marks along the bottom of the linings, near the skirtings
- Skirtings or linings that feel soft, swell or lift
- A room that always feels cooler and wetter than the rest of the house
- Paint that bubbles or peels low on a below-ground wall
The fix depends on what’s happening behind the linings. Moisture readings and a small opening come first, so you’re not stripping a whole room on a guess. Our page on basement leak repair explains how HydrEpoxy works and how we approach each job.
If you’re planning a basement renovation, check the walls before you re-line. It’s much easier to seal block that’s already bare than to pull new linings off later.
Questions we get about a leaking basement wall
How can I tell if my basement walls are wet behind the linings?
Often you can’t by looking. Moisture readings through the linings are the first check. If they’re high, especially near the skirtings, a small opening shows what’s going on behind.
Do you have to remove all the linings on a leaking basement wall?
Not always. We start small. On this job, the small opening found moisture, so the owners agreed to have the linings on both walls removed so we could seal the full area.
Why seal from the inside instead of the outside?
Sometimes the outside of the wall can’t be reached. On this site, a small hand dig showed the old outside membrane was failing, but full re-tanking would need a digger, and one couldn’t get access. HydrEpoxy is made for the inside face and resists water pushing from behind.
How long does it take?
It depends on the size of the walls and the prep. On this job, the application took two days once the walls had been opened up.
Is there a warranty?
Yes, two separate ones. ARDEX gives a 10-year product warranty on WPM 300, and Auckland Waterproofing Experts gives a 5-year workmanship warranty.
Get your leaking basement wall checked
Worried about what’s behind your basement linings? Send Auckland Waterproofing Experts a couple of photos, or call Alex on 022 630 6434. We’ll come out for a free site visit, take moisture readings if it’s possible, find where the water is getting in, and send you an itemised quote.
Email aucklandwaterproofing@gmail.com. We’re available 7am to 7pm, Monday to Saturday, based in Castor Bay and working across Auckland.